Read the transcript / translated subtitles
Captions are based on automatic speech recognition. Terminology and translations are provided for reading assistance; use the original recording to check uncertain wording.
0:00 Follow this production recording of Flying Across China
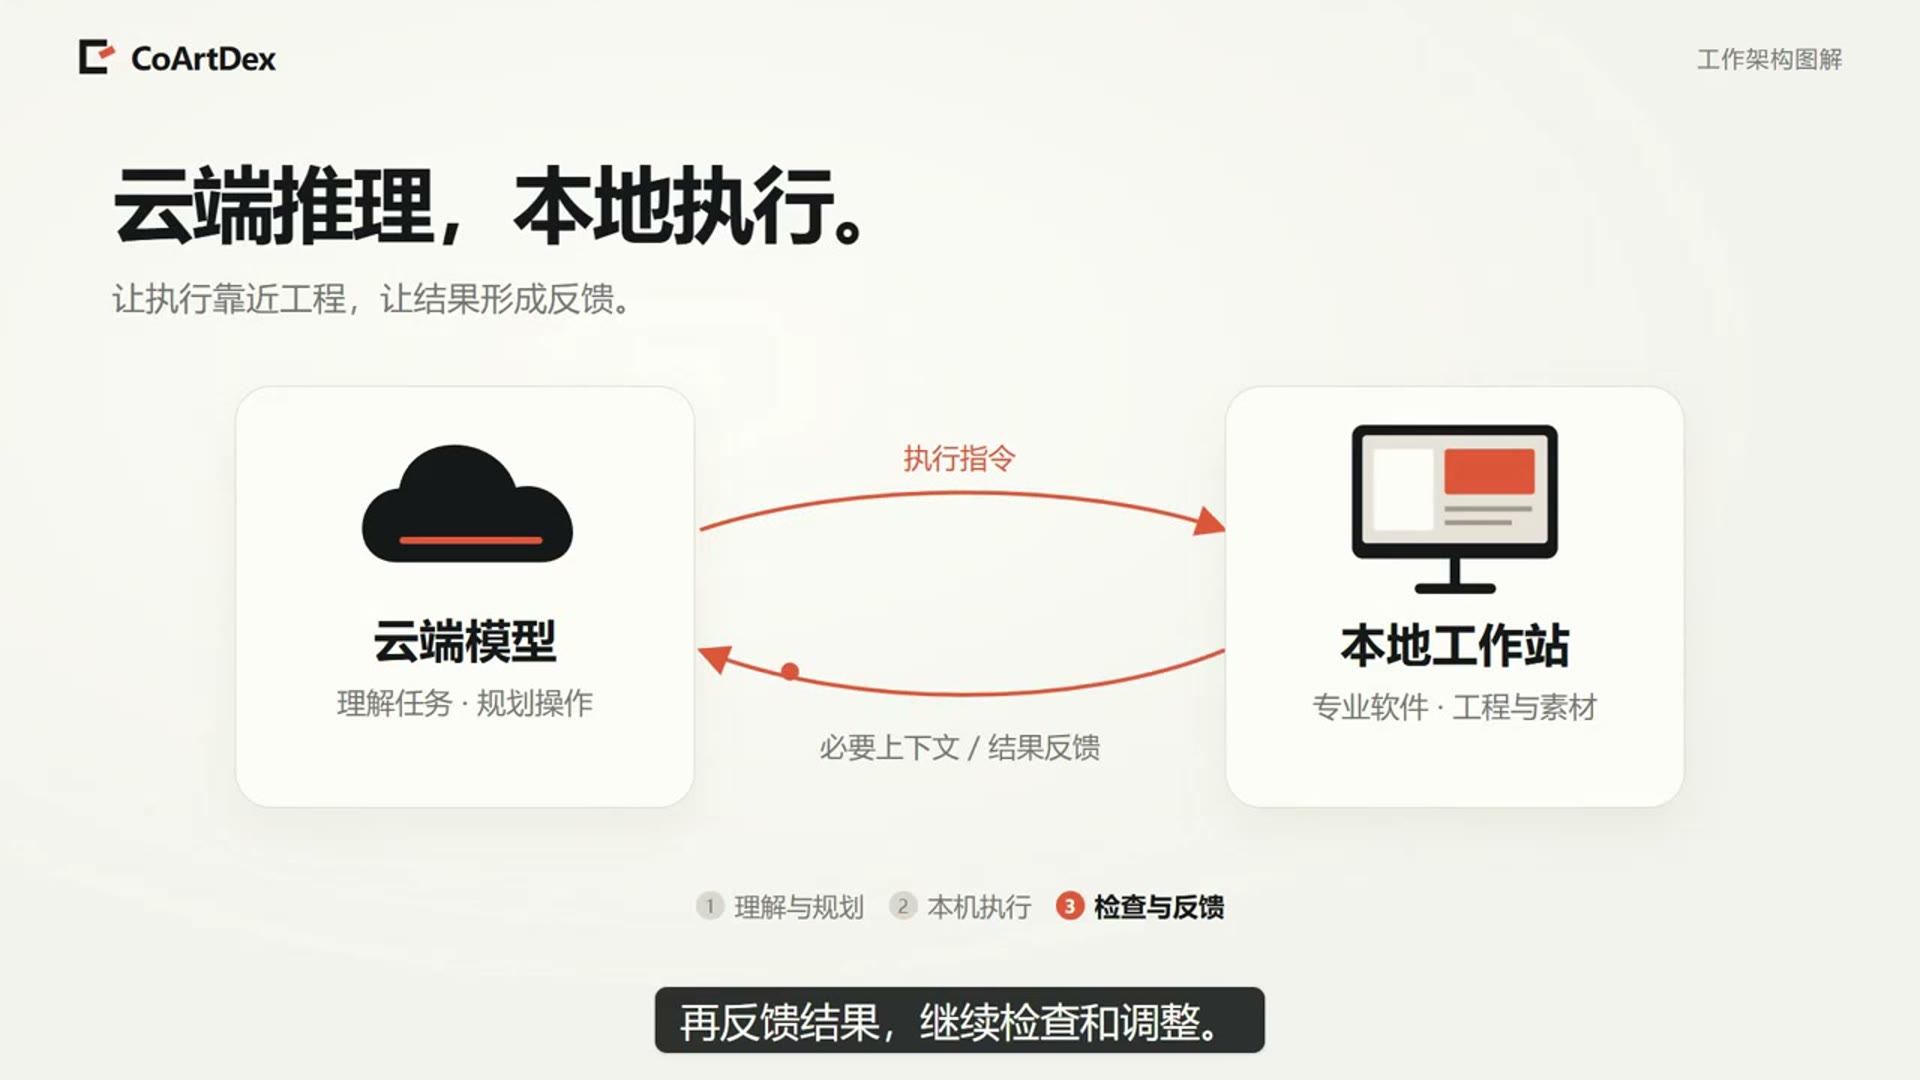
0:03 to learn CoArtDex's video production workflow
0:06 and complete a panoramic shot.
0:08 We will look at the real software interface and key settings,
0:11 from the clay preview to the finished color video.
0:15 The workflow has six stages:
0:17 refine the prompt, model and plan camera motion, create style frames,
0:20 generate video, edit and finish, then export.
0:23 We demonstrate the opening shot on the Pamir Plateau.
0:26 The five-minute film is the overall plan;
0:28 the remaining shots must be produced individually.
0:31 First, use the shot title and prompt area
0:35 to specify the subject, environment, lighting, camera motion and duration.
0:39 For a panorama, also specify a 360-by-180-degree projection,
0:44 a level horizon and complete image boundaries.
0:47 Click Send to chat for refinement.
0:49 The requirements move into the chat input on the right.
0:52 Review the text before sending it.
0:53 Use the conversation to add details,
0:55 then use the approved text as the production brief.
0:59 When the prompt is ready,
1:01 click Confirm prompt, then Next, at the lower right.
1:05 In Modeling and camera motion, specify the starting point and direction,
1:10 changes in speed, and how the shot should end.
1:12 In this example, we reduce the speed in the later section
1:15 to keep the camera within the mountains and inside the scene.
1:20 Under Work location, choose the correct computer and Blender project.
1:24 Then click Start Blender modeling.
1:26 The modeling request is passed into the conversation.
1:28 Only after you send it does the assistant operate the model, camera and lights.
1:32 You can keep requesting changes in natural language.
1:37 For example, speed up a slow move or shorten a route that travels too far.
1:41 Review the draft again after each change.
1:45 In Blender, inspect the generated valley, mountains, camera and animation timeline.
1:51 First check that the space and movement are correct.
1:54 The model can also be edited manually.
1:57 After modeling, click Test render one frame
2:01 to catch camera or projection problems quickly.
2:04 In the test window, choose the panorama preset:
2:08 2048 pixels wide by 1024 high, with clay display mode.
2:13 Select a 360-degree equirectangular projection.
2:18 The 2:1 frame represents the complete spherical image.
2:22 When the test frame is ready, check the horizon and mountain placement,
2:25 and whether all four image boundaries are complete.
2:28 One frame checks only one moment. Review the video for clipping or leaving the valley.
2:35 Once the frame settings are correct, render the draft camera-move video.
2:41 In the video-render window, confirm dimensions, clay mode and panorama projection, then render.
2:50 The clay preview establishes space and motion; style frames establish color, materials and light.
2:56 This is the actual rendered clay draft.
2:59 The full panoramic image boundaries are preserved.
3:02 Check that the speed feels comfortable,
3:04 the route is continuous,
3:06 and the final mist transition matches your intention.
3:09 When the draft is satisfactory, continue to stage three: style frames.
3:12 Preview the draft in the player,
3:15 and check the displayed duration, dimensions and projection.
3:19 Drag the playhead to the beginning.
3:22 Click Add keyframe at the current position.
3:25 Then add another frame at the end.
3:27 The markers below correspond to the keyframe times.
3:30 The list preserves their relationship to the draft video.
3:33 In each keyframe card,
3:36 review the final prompt for that frame.
3:38 Describe the morning light, snowy mountain materials and mist.
3:42 You may also upload a style reference image
3:44 to keep the visual direction consistent.
3:46 After confirming the prompt,
3:48 generate the style image for this frame.
3:51 Inspect the image after generation.
3:53 If it is unsuitable, adjust the prompt
3:55 and generate a new candidate.
3:57 Zoom in to compare mountain structure, morning light and materials with the clay draft.
4:05 Keep the first and last frames consistent in style, color and lighting.
4:12 Choose the style image for each keyframe and confirm that it is used as a reference.
4:18 Once all required keyframes are selected, click Satisfied, continue.
4:22 Stage four is video generation.
4:25 Check both the draft video and the selected first and last style frames.
4:30 The clay video constrains the space and full camera motion.
4:32 The style frames supply materials, lighting and color.
4:35 The two reference types serve different purposes.
4:37 Review the prompt that will actually be submitted,
4:41 especially the automatic clay-frame constraints.
4:43 Keep the clay video's aspect ratio and full duration,
4:47 follow the camera path, and retain the 360-degree panorama projection.
4:52 Require continuous left/right seams and both poles; avoid ordinary perspective or a cropped close-up.
4:59 These are generation requirements. Check each one in the resulting video.
5:06 Next, confirm the generation service, resolution and audio option; duration follows the clay video.
5:12 The recorded example uses 25 seconds at 1080p. Check the options currently available.
5:20 Click Confirm references and prompt
5:22 to prepare the generation quote.
5:23 Review the displayed cost and parameters.
5:26 Only after confirming the cost
5:28 click Confirm cost and generate.
5:30 This quote screen is part of the recorded example.
5:34 The task passes through queued, generating, saving
5:37 and completed states.
5:38 When it completes, open the result.
5:40 Check the image, movement, and first-to-last-frame continuity.
5:44 When the preview is satisfactory,
5:45 click Use this video result,
5:47 then continue to post-production.
5:48 If the inputs have changed since generation,
5:50 the page may flag a version mismatch. Choose which generated version to continue using.
5:57 This is the actual color result from the example.
6:00 The clay appearance has become snowy mountains, morning light and clouds.
6:03 Review the visual result, camera motion and panoramic boundaries.
6:08 Return to an earlier stage to adjust them if necessary.
6:11 For stage five, select the correct Resolve project under Work location.
6:15 To continue with an existing result, confirm its version before starting post-production.
6:21 Specify pacing, transitions, titles and comparison views in Editing and post-production,
6:26 then send the request to DaVinci Resolve.
6:28 This example starts in clay and reveals color with a ripple,
6:32 then uses a moving divider to compare color and clay.
6:36 After editing, return to the preview and inspect the result.
6:40 Check the title, color-reveal transition and moving split screen
6:43 in the actual finished video.
6:46 If it needs changes, describe the problem,
6:48 keep the old version and output another candidate.
6:52 Stage six is export. Enter the filename,
6:55 then check the encoding and local save location.
6:58 The recording uses MP4 with H.264 video and AAC audio
7:03 for playback in common players.
7:06 Click Export and verify file, and wait for the actual file.
7:10 Finally, open the file
7:11 and check its full duration, sound, picture and save path.
7:15 Use a panorama player to inspect the seams and polar regions.
7:19 To recap the workflow:
7:21 first refine the idea,
7:22 then model and verify the camera motion,
7:24 confirm style frames, generate video, edit and export.
7:28 Complete one panoramic shot first,
7:30 then apply the same workflow to the other shots.
7:33 That is the production method shown in this example.